Inputting visitor data into a CSV template
You can create a CSV template using the Download Template button if you have configured the selected visit site to have the Email Address Visitor field set to IsMandatory.
The format of the name of the CSV template is
Visitors Template_<Sitename>_<Datetime>.csv
.
SiteName
is the name of the selected Visit Site and
Datetime
is the date and time the CSV template is created.
For example:
Visitors Template_Main Campus_2017-09-28 15-11-668
.
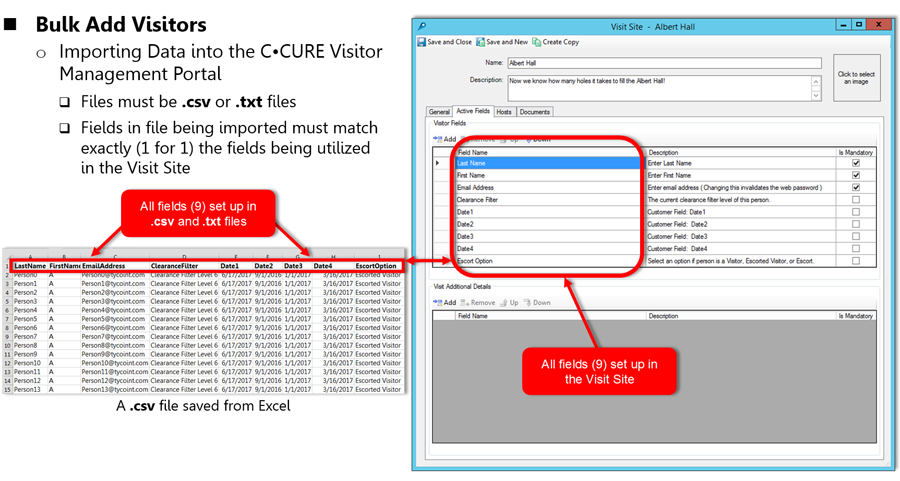
The CSV template contains a header row with the names of the fields in the Active Fields of your Visit Site in the order that you configured them, as shown in Active Fields in Visit Site . You can add extra information to the file above the header and those lines will be skipped in the bulk add operation.
To create a CSV template and input data ready for the bulk upload operation, complete the following procedure:
- Create a Visit or edit an existing Visit.
- Click Import Visitors.
-
Click Download
Template.
Note:
- The CSV template appears in your browser's downloads folder.
-
The Import Visitors button is disabled if the selected Visit Site is All Sites or if a selected Visit Site other than All Sites does not have the Email Address Visitor field set to IsMandatory.
-
If you are using Firefox, clicking Download Template creates a DOWNLOAD TEMPLATE button. Click DOWNLOAD TEMPLATE. A pop up window appears.
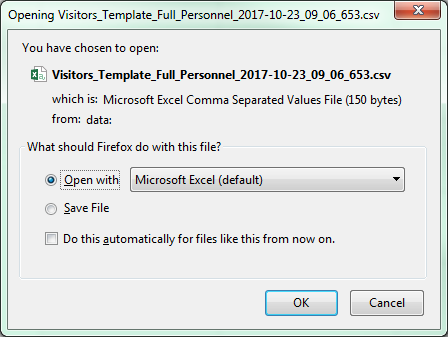
- Open the CSV template.
-
Input the data for the required Visitor Fields into the template in the same order as the header.
- If you are using a TXT file, separate the data with commas.
For example:
LastName, FirstName, EmailAddress Brown, Ian, ibrown@email.com Hayes, Kelly, khayes@email.com Matthews, Tim, tmatthews@email.com - If you are using an Excel file, input the data in the different columns.
Note: There is a limit of 5001 rows for each file when bulk adding visitors to a Visit. A warning appears if you try to upload a file with more than 5001 rows. The row limit does not count the rows before the header row.
- If you are using a TXT file, separate the data with commas.
-
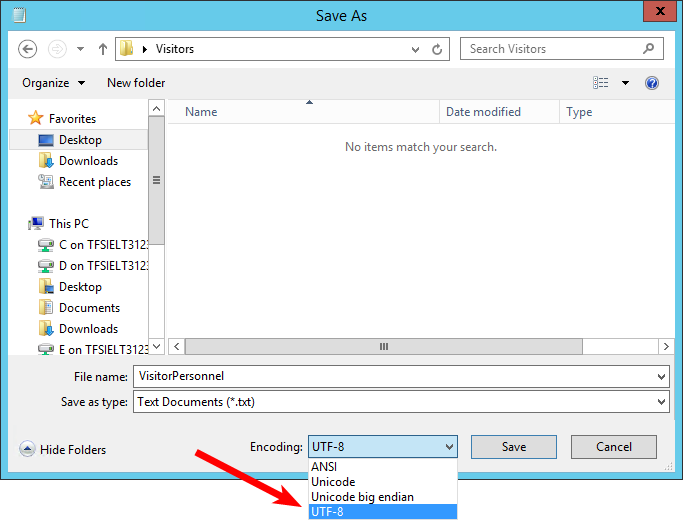
Save the template.