Creating a New Visit in the Reception web interface

To create a new Visit for a site to which you have access, complete the following steps.

  1. Log on to the C•CURE Portal.
  2. Click the Reception icon.
  3. In the Reception application, click the Create New Visit button.
  4. On the Select a Site to create New Visit screen, select a Visit Site.
  5. The Visit Details screen opens and you can configure the new Visit. See Visit Details.
  6. On the General tab, configure the following settings:
    1. Optional: To change the Visit Site, select a new site from the Visit Sites list.
    2. Optional: Select a Visit Template from the drop-down list.
      If you select a template, it may populate some of the fields automatically. Clearances defined in the template can be assigned to the Visit record. These clearances are not visible in the Visitor Management interface.
    3. In the Start fields, select the date and time when the visit starts.
    4. In the Endfields, select the date and time when the visit ends.
      Note: Changing the Start Time always changes the End Time to make sure that the End Time is always greater than the start time. Changing the End Time to be earlier than the start time also changes the Start Time to be earlier than the End Time.
    5. In the Visitors area, select either of the following options:
      • To search for visitors, begin typing a Visitor name. To add a visitor to the visit, click a visitor name from the search results.
      • To creat a new visitor, click the Add a Visitor field, and then click Create New Visitor.
    6. To add a host to the visit, complete the following steps:
      1. In the Hosts area, in the Add a Host field, begin typing a Host name.
      2. To add a host to the visit, click a host name from the search results.
    Note: You can also click Bulk Add Visitors to add multiple visitors to the event.
  7. Click Additional Details and populate the fields with the necessary information.
    This tab is available only if an administrator has designated the Visit with additional specifications that must be completed in order to save the Visit.
    1. Enter a name for the Visit in the Name field. You can enter a name used in a previous Visit, but you must enter a different start time if you enter an identical name for the Visit.
      If you do not enter a Name, the system generates a name for the Visit in C•CURE 9000, but the field is left blank in the Web Portal.
    2. Type in a textual description of the Visit in the Description field. (This text is not sent to Visitors, so this field can be used to provide directions or instructions to other Hosts.)
    3. Click Visitor Instructions and type any textual information that you want to be included in the Email sent to Visitors.
    4. Click Host Instructions and type any textual information that you want to be included in the Email sent to Hosts.
    5. If there are any user defined fields for Visitors, complete these fields.
  8. On the Documents tab, configure the following settings:
    1. To add a document to the visit, click Add New.
    2. You can also view or download documents that are already attached to the Visit by choosing from the drop-down list. See Attaching Documents to a Visit.
    Note: There may also be Documents already attached to the Visit that are from the Visit Site - these document attachments cannot be removed.
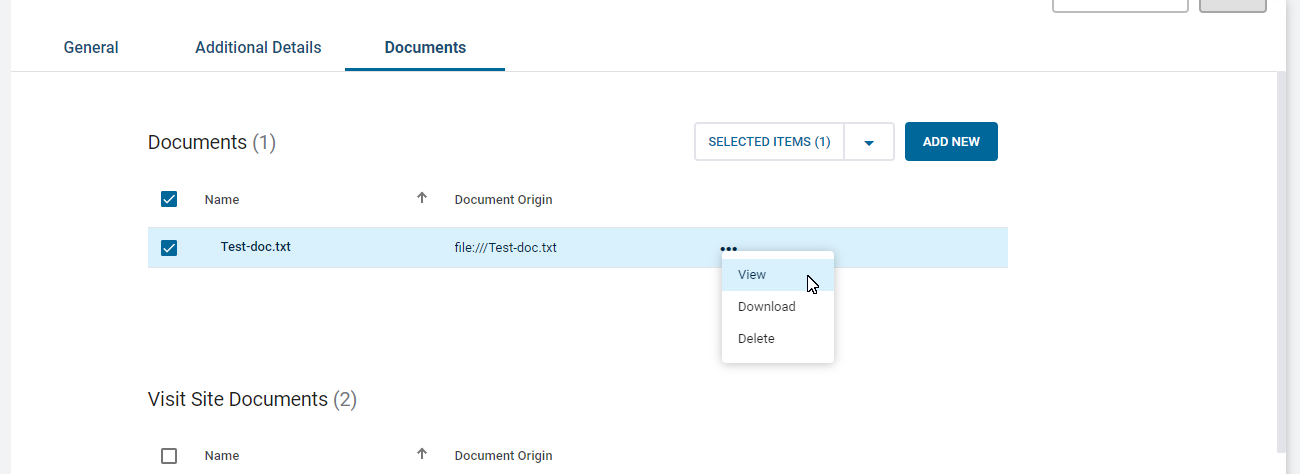
    Note: Not all attached documents can be viewed and downloaded. Some options may differ, depending on the internet browser that you use to access the Web Portal.
  9. Select one of the following options:
    • To save the Visit, click Save.
    • To save and email the Visit, click Save and Email.