Reception portal main screen
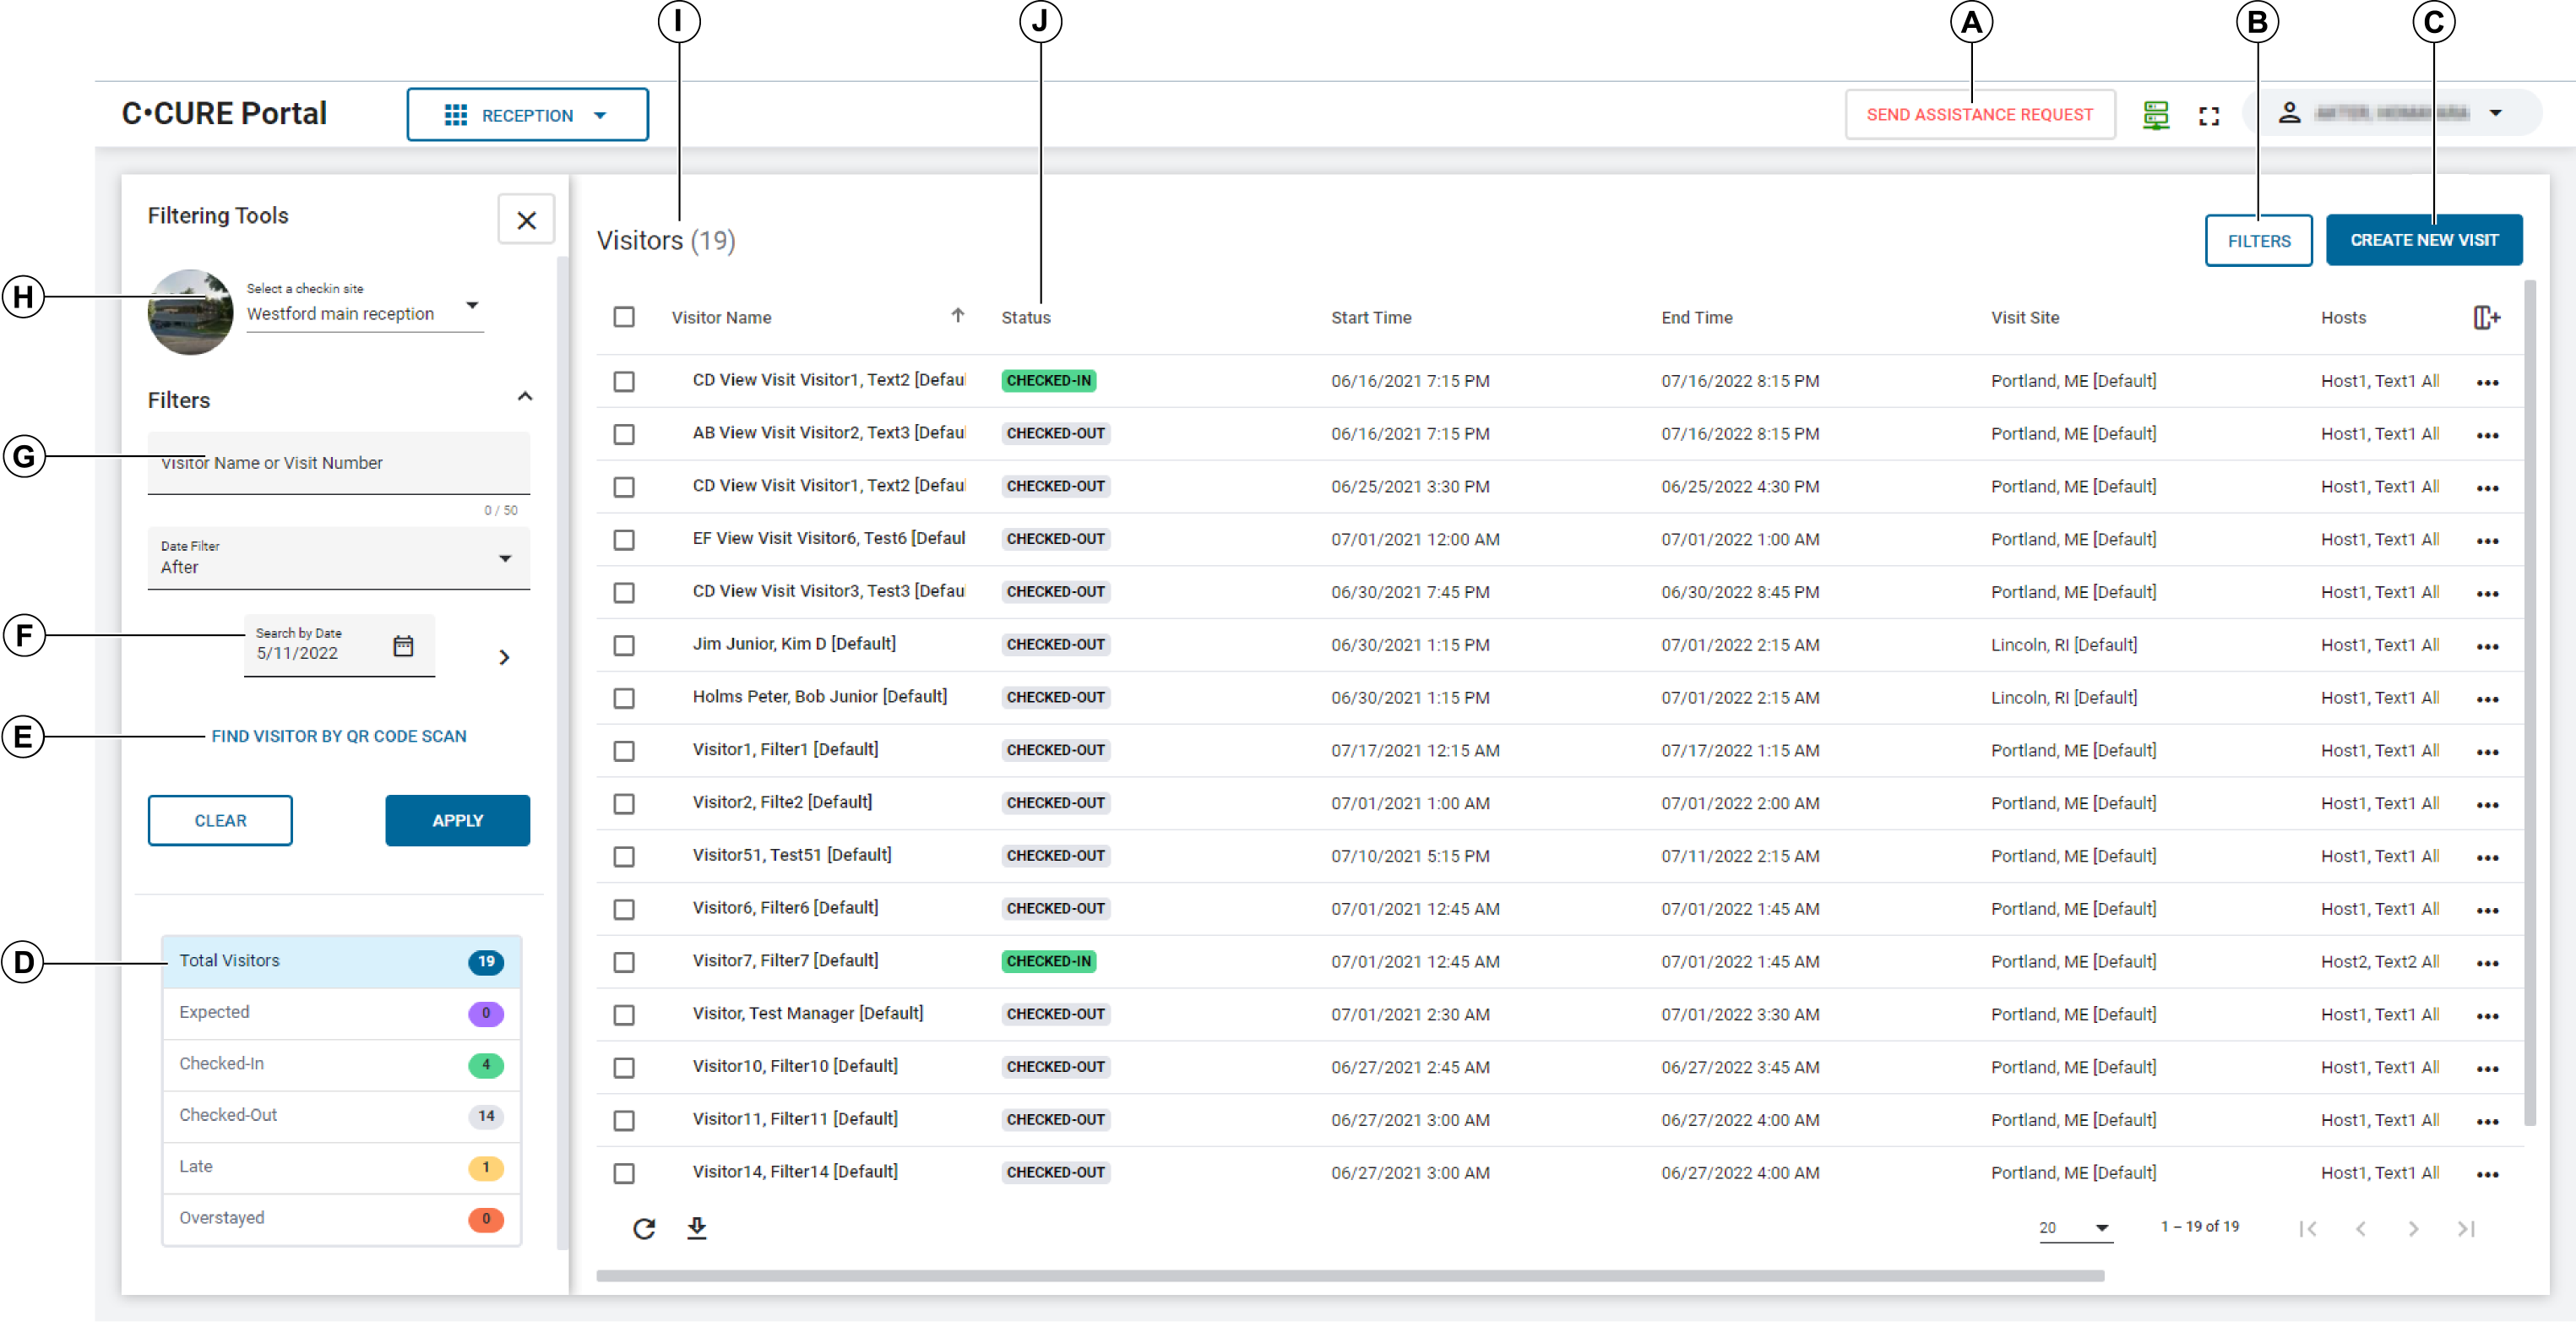
The reception portal screen shows a list of visitors for a chosen day.
| Key | Description |
|---|---|
| A | Send Assistance Request button. Click to request assistance with the check-in site. You can also request assistance for a visitor from that Visitor's context menu. |
| B | Filters button. Click to show or hide the Filtering Tools pane. |
| C | Create New Visit button. Click to create a new Visit. For more information, see Creating a New Visit in the Reception web interface. |
| D | Status widgets. The status widgets display Visitor counts for the selected day based on their status. The status widgets update every minute. To filter the Visitors list by status, click a status widget. |
| E | Find Visitor by QR code scan. You can use QR code with the reception to find the visit that the visitor belongs to. The receptionist can then checkin the visitor after verifying the visitor identity or after completing the typical reception workflow. Click Find Visitor by QR code scan to activate the camera to take a photo of the QR code. |
| F | Search by Date. Filter Visits or Visitors by date, or if the date is unknown, to use the date filter to filter before or after a chosen date. |
| G | Visitor Name or Visit Number search field. Search for a Visit or a Visitor using this search field. |
| H |
Select a checkin site. Click the check-in site to change to a different check-in site. |
| I | Visitor
list. Displays the list of Visitors on the chosen date. |
| J | Status
list. Displays the current status of each Visitor. |